Microsoft added a custom UI option for MSIX Packages several years back, but the only reference to it was a web page How to create a custom App Installer UX – MSIX | Microsoft Learn that contained the following notice:

Because of this note, we have been ignoring this capability. I recently detected that the page had been updated, although still containing the note, and decided to try it out to see what would happen. I had issues and suspected it was disabled on the OS but when I asked for clarification, a sharp-eyed reader pointed out that the new version of Teams that came out as an MSIX package was already using it. After a bit of trial and error, I figured out why it wasn’t working for me, and I added a feature into TMEditX 3.7 that make use of it to enable an enterprise to “brand” the packages they create.
The “Branding” in this case applies to when an MSIX package is installed using the Desktop AppInstaller GUI (what you get when you open an MSIX file).
The capabilities exposed, currently, by the customization are rather limited, and in my tool I have further limited the options to make it simple to use this customization for the purpose of branding.
Here is an example of the settings you could select in TMEditX for branding:

If you choose to brand your MSIX packages while fixing them up, on the File->Options tab you would select the “Brand Package before save” option, and then select a Background and an Accent color. The other text boxes are optional.
- The background color will be used for the background of the window that the Desktop AppInstaller will display. You should usually pick a fairly light color. There are parts of the UI that you cannot control that will use black text on this background.
- The accent color is not directly used but will instead have a heavy influence (along with the background color choice) on the color used for some of the UI components. Primarily, it is used for the background color of the install/update buttons, and for the background for the checkbox to launch the app after installation. It also affects the color of the text for links and the flyout (which has the “capabilities”) display.
You also can define the other three parameters shown in the configuration. The Company Name field, if filled in, will be applied to the install/update buttons for branding. Given the limitations of what we can do, it is really the only place to be able to do this. The Disclaimer Label field and Disclaimer URL field, if filled in, will cause an additional link on the AppInstaller UI.
An example of how this might look, given the settings shown above, is seen here:
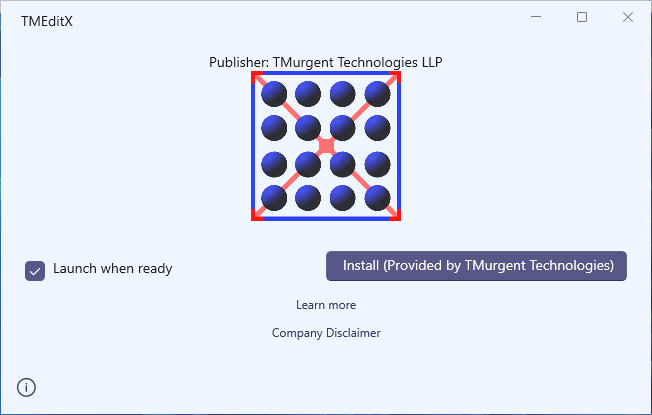
As you might notice, the actual background color displayed for the Button isn’t quite the same as what I asked for. Because the background wasn’t pure white (slightly blueish-green) Microsoft added some red to the button color. There seems to be an algorithm involved in the decision of what color to use for the display. So you might find that you have to play around to get something close to what you want if you are hoping to use your corporate color schemes.
In this next example, I requested a black accent on white background.
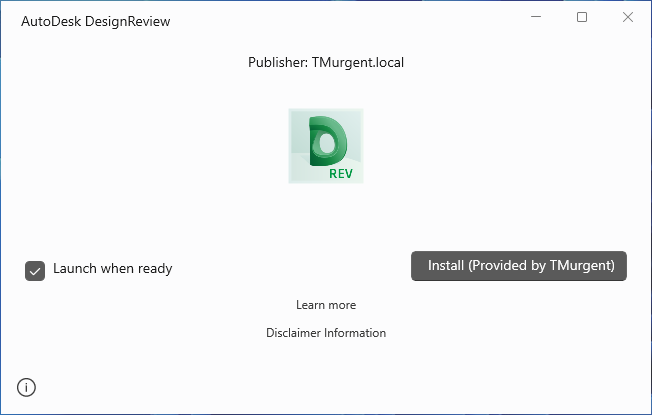
You can see that the button is grey rather than black, but at least it is a dark enough color to not confuse the user into thinking that the button is disabled.
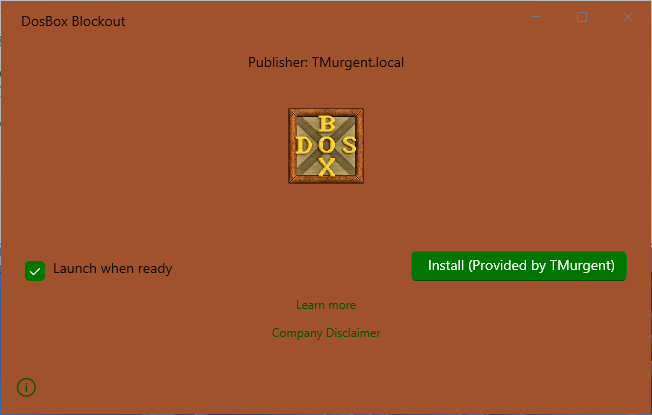
And here is an example of trying a dark background, which showed that getting a good color for the button is hard.
I chose to simplify the options that I made available in the TMEditX configuration with a few hard-coded things; center the items horizontally, leave the application title showing at the top, move the capabilities listing to a flyout (seen by clicking the “learn more” link), and showing the Launch checkbox. And no, there is no custom capability to automatically uncheck that checkbox! That would be my number one request for a change to what Microsoft allows us to customize here!
The information provided in the article I referenced details out what happens to the package, which is just an additional XML file placed in a special folder with a special name. Not mentioned in the article is that the XML file must be formatted as UTF-8 but must not include the bom. Troubleshooting a bad custom UI xml file is done by using DebugView when starting the Desktop AppInstaller with your package. If the AppInstaller doesn’t like your file for any reason, it will output the problem to the debug console port and then ignore your customization and display the normal UI.
The schema file for the xml is found in the Desktop AppInstaller program installed on your system, and there are currently no options other than described in the article. The sample XML in that article does reference a V2 for the schema, however I have not been able to locate one, and it seems that the AppInstaller doesn’t currently support it if it does exist. The MSIX Teams package does include the reference to V2 in its XML file, but just like the example in the article, doesn’t really use it.
So, we can do a simple branding to our packages if wanted. This feature was added to TMEditX version 3.7. The full blog describing additional features in that release is found here.